Thursday, January 22, 2015

Snicker Salad.

I feel like Snicker Salad is kind of a blast from my past.  And I guess when I look at our church cookbook that I used as a guide for this recipe, I suppose it really is a blast from the past.  Looks to me like the cookbook was published in 1998/1999?  Crazy.


Anyway, this is a delicious and easy 'salad' that will be welcomed at any potluck or when asked to bring a dish to pass.  AND, if you want to make it even easier, Snickers have created unwrapped BITE-SIZE bars that wouldn't even need to be chopped prior to adding to the salad.  I cut mine in half since I eat with a two year old, but if serving to older children and adults, I'd say don't even both chopping.
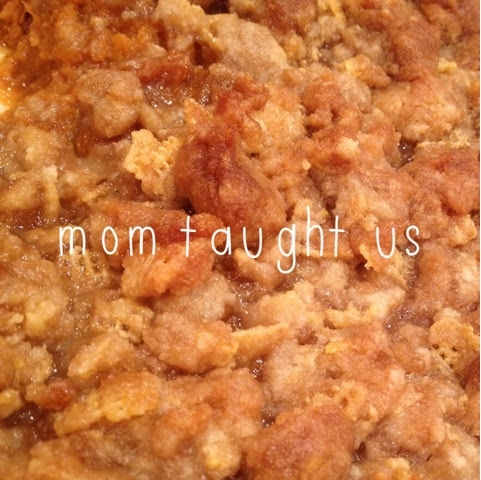


Snicker Salad
(Recipe adapted from my mom)

4 packages Snickers Unwrapped Bites (2.83 oz each if calculating how many regular sized bars you need)
3 medium apples
1 large box instant vanilla pudding
1 1/2 cups milk
16 oz Cool Whip

Whisk together pudding and milk.  Place in the refrigerator while chopping apple and snickers.  Remove pudding from fridge and mix with cool whip.  Combine completely.  Add apple and snicker chunks.  Mix to incorporate.  Serve within a few hours of making. 


This does keep as a leftover for about a day before the apples and snickers start to get funky.  It's not likely that you'll have leftovers, but I do want to give that fair warning!

Lighten up by going with sugar free pudding and/or using less snickers.  :)

Tuesday, December 23, 2014

Sweet Potato Casserole.

Our family goes grocery shopping every 4-6 weeks with quick stops for milk and lettuce in between.  We are nearly due for our shopping trip so I'm making sure that all perishables are used up prior to buying new.  Sweet potatoes were on my hit list.

I've only seen sweet potato casserole prepared with marshmallows on top.  While I love an ooey gooey Rice Krispie Treat made with extra marshmallows, I've never been attracted to them on sweet potatoes.  And my husband doesn't like pecans...so I set out to create a crunchy topping on my sweet potato casserole without marshmallows and without pecans.

The result is nothing short of delicious.  All through supper my husband kept saying that he should go grab some ice cream because it tastes like a dessert!  For that reason, this makes the perfect special occasion side.  And, yes, I'm going to make it again on Christmas because I think it's that amazing!


Sweet Potato Casserole.
(Recipe by Me; Inspired by Taste of Home)

Casserole:
4 lbs sweet potatoes (peeled and cubed)
1 cup milk
1/4 cup brown sugar
6 tablespoons of butter (softened)
1 egg (beaten)
1 1/2 teaspoon ground cinnamon
2 teaspoons vanilla extract
3/4 teaspoon ground allspice
1/2 teaspoon salt
1/4 teaspoon ground nutmeg

Topping:
3/4 cup flour
3/4 cup brown sugar
3/4 cup crushed Chex cereal (crushed)
1/2 cup butter (melted)

Place cubed sweet potatoes in a saucepan and cover with water.  Bring to a boil.  Reduce heat, cover, and cook for 20 minutes.  Drain.  Put sweet potatoes into a mixing bowl (I used my Kitchen Aide Mixer) and mash.  Add remaining casserole ingredients and beat until smooth and well combined.  Transfer into a shallow 2 1/2 quart baking dish.  Combine topping ingredients and sprinkle over sweet potato mixture.  Bake, uncovered, for 50 minutes in a 350 degree oven.


I love that we got 'crunch' from the cereal and didn't have to resort to pecans or marshmallows for this recipe.  You could also pull this off with corn flakes, cinnamon toast crunch, and probably rice krispies!  If your family likes pecans you could do half pecans and half cereal which I think would actually be tastier than just pecans.  However you decide, just make this!  And if you want: serve it as dessert!  :)

Friday, December 19, 2014

Butterhorns.

So about those butterhorns that I referenced on my Facebook Page...

This kind of remind me of a croissant (love) but not greasy.  And I love that they are simple to make and can be made ahead of time!!  And I enjoy watching my niece (1 year old) grab one and run off with it.  Girl likes her auntie's yeast bread/roll making!

I first saw these on Melanie Makes blog.  I've loved Melanie since my college years - nearly ten years ago when she was one of the top scrapbookers.  Since that time she has flipped her creativity into the food world.  Plus she lived in Wisconsin for a time while her husband attended medical school (On Wisconsin!).  Anyway, Melanie always has a Thanksgiving Menu that I only dream of and this was on the 2014 menu.  Melanie gave rave reviews and sent readers over to this blog where Courtney urged readers to get up and mix up the butterhorn dough and then get back to what you were otherwise doing.  I obliged.  ..and have made three batches since.


Butterhorns
Recipe from Neighbor Food

2 tablespoons yeast
1 cup lukewarm water
1/2 teaspoon salt
1/2 cup melted butter
3 eggs (beaten)
4 1/2 cups flour

Mix together yeast, water, and salt.  Let sit until dissolved.  Add in sugar, butter, eggs, and flour.  Mix well.  Cover with saran wrap and place in refrigerator overnight.  Dough will nearly double in size.

The next day, take dough and divide it into four equal pieces.  Flour your work surface, hands, and rolling pin.  Roll out each piece of dough into a 9 inch circle.  Slice the into 8 equal triangles.  Roll up starting from the wide end and ending at the narrow end.  Place on a baking sheet (preferably lined with parchment paper; and did you know they make already-cut parchment paper!?!  Mine is from a company called U-Line and it's wonderful!)  Cover rolls with a dish towel and allow to rise for 2 hours.  Bake in a 350 degree oven for 8-10 minutes or until golden.

Serve warm to really treat yourself and guests.

But wait, there's more!

These can be frozen right after rolling up or frozen after letting them rise or frozen once baked.  Remember, I said they can be made ahead!  Head over to Courtney's blog if you want to learn more about these other methods!  

Friday, October 10, 2014

Garlic Cheese Loaf.

I'm pretty sure that Garlic Bread is easily on my top ten favorite foods of all time.  French bread drown in garlicky butter with or without cheese?  Come on!  I'm fairly sure a lot of it in the drowning of butter.

This Garlic Cheese Loaf does not disappoint.


Garlic Cheese Loaf
(Recipe adapted from unknown source by me)

1 loaf crusty bread (Think sourdough.  The denser the bread, the better.)
Garlic Butter (made by mixing together the following) 
  • 1 1/2 sticks butter
  • 3 tablespoons Tastefully Simple Italian Garlic Bread Seasoning (This is where I am going to tell you it is important to use this seasoning.  The blend contains garlic, onion, parsley, bell pepper, chives, and more.  This is what makes the Garlic Cheese Loaf.
2 cups shredded Mozzarella

Melt garlic butter.  Cut the bread on a diagonal - both ways.  You'll want to cut so that you are nearly through the bread, but don't go through the bread.  Use your fingers to open each crack and fill drizzle with butter.  Use up all the butter.  If some drips on top of the bread, that's OK!  Next fill the cracks with cheese.  Again, your end result may look messy, but once it's baked, it'll look perfect.  Wrap the bread with foil and bake for 15 minutes in a 350 degree oven.  Unwrap bread and bake for an additional 5 minutes.  Serve immediately.  


I served this bread with soup.  It would also pair well with any type of Italian dish or a pot roast or on it's own.  We had some leftover and stored it in the fridge.  When eating with just warmed it up a bit in the microwave...still amazing.


Wednesday, September 3, 2014

Raspberry Bars.

While so many are saying that summer is over and that Labor Day is the official end of summer; I disagree.  Late summer around here means making a third crop of hay and raspberries.  Pails and pails of raspberries.


My inlaws have a small raspberry patch and that thing gets loaded with berry each late summer.  It's kind of like a last blast of summer and will last up to a killing frost.  I was gifted a bucket of raspberries over the weekend and quickly turned some of them into raspberry pancakes the next morning.  And we've been eating them fresh.  Today was the day I needed to freeze them before they went bad....but before I froze them all I whipped up these Raspberry Bars so that my husband and daughter would have a treat when I was away for a couple hours tonight.

These bars are a perfect mix of sweet and tart.  They are easy to make, but hard to resist during the long cooling/setting up time.  Do yourself a favor and have something else planned during that time!  It will resist the temptation to dig into these before they are quite ready.


Raspberry Bars.
(Recipe Adapted from Better Homes and Gardens)

1 cup butter
1/4 cup packed dark brown sugar
1 teaspoon salt
2 cups flour
3/4 cup raspberry (or other berry variety) jam
3 cups fresh raspberries
8 ounce cream cheese
1/2 cup granulated sugar
1 tablespoon flour
1 egg
1 egg yolk
1 teaspoon orange zest
2 tablespoons lemon juice
1/2 teaspoon vanilla extract

Form dough for the crust by combing the butter and brown sugar.  Mix until combined, but not creamed.  Add salt and flour.  Mix until fully combined.  This will take a while...the mixture will start out crumbly, but with enough mixing, it will be smooth.  (This is a good mixing job for your Kitchen Aide or other mixer).  Press dough into the bottom of a greased 9x13 pan.  Bake for 20 minutes in a 350 degree oven.  Allow to cool while you mix up the topping.

Beat cream cheese until smooth.  Add sugar, flour, egg, egg yolk, orange zest, lemon juice, and vanilla extract.  Beat until combined and smooth.  Set aside.

Spread jam evenly over the top of the crust.  Sprinkle with raspberries - using more or less based on preference.  Pour topping evenly over berries, tilting pan back and forth to ensure even distribution.  Bake in 350 degree oven for 30 minutes.  Allow to cool on the counter for 1 hour and then chill completely in the refrigerator for 2 hours.  Cut and enjoy.


There you have it!  A wonderful way to enjoy late summer or early fall as some may call it.  Either way, this is when the berries are ripe and this is what we call a summer treat. 

...and don't worry...I'm itching to start fall baking...apples, pumpkins, and spices...oh my!

Monday, September 1, 2014

Crock Pot BAKED Potatoes.

Earlier this summer my husband requested meatloaf for supper.  It sounded good because we hadn't had it in so long that I was game for making it.  The only problem was that our house heats up so easily and I kind of dreaded the though of starting the oven.  In addition to that, I wasn't actually going to be home at the time that I wanted to put supper in the oven to have it down at a certain time (which is a constant battle!!)  That's when I decided to get out my trusty crock pot.  Crock pot meatloaf?  Yes, please!

And what to serve as the starch?  Baked potatoes, of course!  Again: crock pot!!  So easy and so delicious.  I'm fairly certain this will be the only way that I make baked potatoes from here on out.

Crock Pot BAKED Potatoes
1-8 of your favorite potatoes
Olive oil
Salt
Aluminum Foil

Wash and scrub potatoes.  Use a fork to prick the potato all over.  Run olive oil over potato, sprinkle with salt, and wrap in aluminum foil.  Place potatoes in slow cooker and cook on low for 8-10 hours.  Remove from crock pot and enjoy.

That simple.  And that good.  Happy potato 'baking'!!


Monday, July 21, 2014

Balsamic Cucumber Tomato Salad.

There are few things better than fresh vegetables in the heart of summer.  Whether they are straight from your garden, or the farmer's market, or your generous neighbor, they just can't be beat!


After a weekend of eating summer event food (think: burgers, beers, cheesecurds) I knew I wanted something light for supper and as lunch the next day.  I also wanted to use up the beautiful cherry tomatoes I had on the counter and some of the cucumbers from the neighbor.  Enter Balsamic Cucumber Tomato Salad.

Balsamic Cucumber Tomato Salad
(Recipe by Me)
1 pint cherry tomatoes (quartered)
2 small cucumbers (chopped)
1/2 small onion (thinly sliced)
3 tablespoon Tastefully Simple Balsamic & Basil Dipping Oil
2 tablespoon balsamic vinegar
Salt/pepper to taste

Toss ingredients together to coat with oil/vinegar and salt/pepper.  Serve as a side or enjoy as a light meal.


I LOVED this.  Even my picky husband ate some and my nearly-two year old picked out the cucumbers and then the tomatoes.  :)

SIDE NOTE:  I am happy to help you with any Tastefully Simple needs you may have.  I am an independent consultant who loves the products.  While they can all stand alone, my favorite use is incorporating them into delicious dishes beyond their stand-alone use :)